Wednesday, April 20, 2011

FO: Bunny!

I don't even want to think or look up how long it's been since I posted last! My knitting time has taken a big hit, so I haven't had much to post. But I want to get back into the swing of things. If any of our lovely readers are still out there and care, I actually finished knitting something, and I wanted to share.


Bunny
pattern: Rabbit by Susan B. Anderson
yarn: Spud & Chloe Sweater (55% superwash wool, 45% organic cotton) in 7500 Ice Cream - less than 1 skein
needles: US5
made for: Bean

So Bean is a couple days shy of 22 months and believe it or not, this is the first toy I've made for her! What kind of knitting mommy am I? (Don't answer that!) I've knit a few toys and each time I do I remember how much fun they are and tell myself how I should really make more. I really should make her more. I'll have to see how Bunny goes over, but Bean is into her stuffed animals now, so I'm hoping she'll like him!

Happy Easter and Happy Spring, everyone! :)

Wednesday, November 03, 2010

Happy (belated) Halloween!

We hope you all had a safe and happy Halloween. We LOVE Halloween around these parts, as you might remember from years past. This year was no different!

Elliott and my costumes this year were totally inspired by the cutest Garden Gnome costume I saw over on Ravelry. I thought that was the cutest idea for a toddler costume and despite the fact that I already had two perfectly good costumes at home for him to wear...I couldn't help myself. I kept thinking about what I could do and pretty soon I just had to make it!

My costume was also born from my desire to be something pretty this year. If you notice from costumes from previous years linked to above, I am rarely a girl for Halloween and when I am, I'm not usually a 'girly girl'. So this year I was determined to be pretty :) When I saw that cute garden gnome costume it reminded me of Snow White and the Seven Dwarfs, so I took that and ran with it!

I ended up making myself a simple elastic waistband skirt out of cheap quilting cotton and modified a cheap $4 Joann's t-shirt into the 'bodice'. I cut out the neck, cut off the hems then added elastic to the bottom of my sleeves for a little poof. I also sewed up a quick red cape (also from quilters cotton) using the play cape tutorial over on Sew Mama Sew. I used a yard and a half instead of a yard and got a pretty respectable length cape.

And of course a black Hallowig! This knit up super quick using almost one entire ball of black Patons classic wool. I had planned to have it flip at the bottom like in the pattern photo, but when it grew after washing, I hemmed the bottom instead making a cute little bump. I finished it off with a bit of red ribbon.

Snow White Hallowig

Elliott's dwarf costume was crazy simple to put together. He wore a pair of brown cotton pants, an oversized long sleeve green shirt, and a pair of fleece 'boot' slippers as well as a 'belt' that I sewed together from a piece of black 1 inch elastic. (I tried to get him to wear a real belt...but apparently that was very traumatizing and involved lots of tears. Since this is supposed to be a fun holiday, I opted for a more toddler-friendly option ;)

I improvised a beard bib using some 'santa beard' fur fabric from Joann's. I just put right sides together traced the upper part of a bib directly onto the wrong side then made a beard shape at the bottom. I pinned, cut and sewed without messing with anything because this stuff shed like crazy. Once I turned it inside out, I added snaps and presto: a beard that a kid will keep on!

The hat was equally improved and easy. I sewed it together using some knit fabric with a tad of spandex. I measured Elliott's head, subtracted (maybe 3-4 inches) for some negative ease and used the natural tube of the fabric so I only had one seam to sew. I just made a straight tube for about 6-7 inches, then tapered it down to a rounded 'point', sewed the side seam and added a rolled hem. Easy peasy! And the best part? He actually WORE it! This kid hasn't kept a hat on his head for longer than 2 seconds for almost a year!

Happy Halloween!

We had a great time this year and it was so fun to see Elliott start to get into it. He helped me carve pumpkins and really seemed to enjoy wearing his costume to my office potluck and his Gymboree class. All in all a super great Halloween!

Friday, September 03, 2010

Elmo's Baby Quilt and Pillow

**dusts off cobwebs** Well, hello there! Long time no see. We certainly didn’t intend to take such a long blog break, but as usual life happened and we’ve been busy! After all, running after toddlers can really put a dent in your free time ;) But I am super excited about my latest quilting project and I couldn’t wait to share it with you!

As some of you long-time readers my recall, we are actually a threesome. But knitting had to take a sideline for Nasus while she went to law school, took the bar, and became a practicing attorney (Yay, Nasus!). However, we are happy to report that Nasus is expecting her first child, a little girl, this coming October…which of course meant a good excuse for a new quilt!

Stacked Quilt - top

Last year at the Long Beach Quilt Show, I put together some Japanese import fat quarters from a couple different booths. I fell in love with the cute and charming little prints and knew that I wanted to feature them in a quilt project. I found some nice coordinating red prints to go with the cream character prints. When I got home I put everything away and promptly forgot all about them.

Stacked Quilt - top close up

When we first found out that Nasus was pregnant, I immediately started scheming for an appropriate project. I had initially planned to use some of my Riley stash, since it is pretty girly, but when I went digging through everything, I came across the Japanese prints and instantly knew those were the prints for Nasus. I knew the red and cream with be a good fit for this project, since Nasus is a bit on the nontraditional side, like me, when it comes to pink=girl/ blue=boy scale of baby items. Plus, although in my heart I knew she was having a girl, Nasus hadn’t actually found out the gender of the baby when I started this project.

Stacked Quilt - binding close up

I played around with a stacked coin idea for this quilt, but when Oh, Fransson! re-released her Simple Modern Baby Quilts pattern, the stacked version was perfect for the fabrics I had.

Stacked Quilt - back

In addition to the Japanese fat quarters, I added the primarily blue print (also a Japanese import) and the red with blue checks print for the binding and some of the red ‘stacks’. The solid is a red Kona solid, I believe in tomato. These additions came from Levine’s during my first ever trip to the L.A. fabric district. (So much fun! I was like a kid in a candy store!)

Stacked Quilt - back close up

The piecing of this project was super easy, although I learned that I need to work on my ‘scant ¼ inch seams’. And with the extra bits leftover from the quick piecing method used to make the blocks for the quilt, I decided to make a coordinating pillow.

Stacked Quilt - top with pillow

Now, I know babies don’t use pillows and when I received a similarly sized pillow for my own baby shower, I couldn’t imagine what I would ever use it for…until Elliott got close to a year and loved playing with our pillows. Then it dawned on me that he was physically mature enough that a smooth pillow was no longer a serious suffocation hazard. I put his pillow in his crib and the rest is history! It is now one of this favorite things and he falls asleep every night on his pillow.

Stacked Quilt - top with pillow

I’ve never made a pillow before and thought it would be fun. I more or less winged the pattern, just playing around with my scraps. I also wanted to add a zipper so that the pillow could be washed when the pillow inevitable got blurped on or smeared with godknowswhat. I learned how to put in an invisible zipper and while it certainly isn’t perfect, it really makes it look more professional. B was very impressed ;)

Stacked Quilt - top with pillow

So there you have it…Elmo’s baby quilt and matching pillow. I can’t wait to meet Nasus’ little girl and I hope she enjoys her gifties!

The Girls and their Babies

Wednesday, May 12, 2010

Finished Object: Liesl

As I mentioned previously, Liesl has been my primary knitting project since January. Coming off the Christmas gift production rush, I was hungry for something just for me. I had some suitable yarn (Nature Wool) in an acceptable colorway, and was encouraged by the accounts of how quickly this worked up. And I can see now why if you are knitting more regularly than I am, why people make more than one Liesl. These really do fly off the needles. My knitting time has been patchy at best, but when I did work on it, the progress was remarkable!

Liesl - front

My original goal was to make a full sleeve version and use up all my yarn. I managed to accomplish neither, but I'm fine with that. Due to the fact that I was brain fried when I was starting the first sleeve (it took me three sessions of looking at everything and estimating before I was able to actually get the pattern stitch started...no fault of the pattern, the pattern was great...this was purely a result of being too tired), I decided that actually starting the sleeve took more priority that getting up, getting out the scale and measuring my yarn.

Liesl - back

As a result, I just decided to wing the sleeves. I knit the first as long as possible while still being confident I had enough yarn to knit the second. I also could have gone back and added more to the first sleeve once I knew I was safe on yarn, but again, by the time I got to that point, it was more important for me to finish this project than to eek out every last inch of yarn. While I LOVE using every bit of yarn for a project, and get a runners high just thinking about it, I also find the process of yarn "eeking" very stressful. And frankly, right now, I just want to enjoy my knitting time. So in the end, I ended up with 3/4 sleeves and I'm totally fine with that :)

Liesl - close up

I also made my Liesl with two buttons instead of three...mostly because I forgot about the 3rd button hole until it was way too late to go back. But given the size I ended up with, I think that worked out in my favor, since the third button would have pulled too much over my bust line.

And that brings me to the size. I failed to mark the size I was working up on the pattern...I also failed to realize I had noted the size in Ravelry. So I switched from working up a 38 to working up the size below when I split everything for the sleeves. Oops. Which is too bad because while it is very wearable as is, it would be even more so if it were a little larger.

Liesl - in action

I also highly recommend making this in a more squooshy or soft wool. The Nature Wool is great, but I could see how anyone with a sensitivity to wool wouldn't want this right on the soft parts of your arms. I opted for the Nature Wool because it was in my stash and, dudes, this economy sucks...so yeah, new yarn wasn't really in the budget. But, if you do have something like Malabrigo in your stash or can buy some for this project, it would be awesome!

And now for a gratuitous baby (I mean toddler!) picture...please focus on the cute baby, not the funny looking mom ;)

Liesl - in action

Sunday, May 02, 2010

Elliott's Birthday Quilt

In honor of Elliott's first birthday I held a little contest over on our family blog. Part of this was to help some of my family members get a little more comfortable leaving comments on a blog, but it was also a great excuse for a new project...this time a quilt!

Birthday Quilt - top

Last year I visited the Long Beach Quilt Show where I scored four Moda Blossom charm packs for $3 a piece. I was even more fortunate to have an extra piece of a nearly solid brown print in one of the packs. As a result, I was able to use this extra square as the center of a radiating pattern that repeated the other fabric prints outward in a very deliberate patchwork layout.

Birthday Quilt - top

Finished dimensions: ~46 x 46

I didn't use a pattern for this quilt, but just started from the center and laid out the prints in what I was hoping to be an appealing manner. As is usually the case, B was able to help me tweak my 'good' layout into something really nice. (I was originally going to have all 5 of the dark brown prints as an anchor in the middle...like a big plus sign. B showed me how by alternating the color themes of the prints and pulling those brown pieces farther out it didn't look so heavy. And trust me this looks SO much better!)

Birthday Quilt - back

The back is pieced with Kona cotton.
(Excuse the askew photo - it's really hard to take full quilt pics by yourself!)

The back of the quilt ended up being a very happy accident. My original plan was to have a strip of the leftover charm squares running down the side and perpendicular to three solid panels of different colors and widths making up the rest of the back. (Un)fortunately, I cut my brown fabric the wrong way when I was cutting my binding fabric and no longer had a piece large enough to span the entire back. I was just going to buy more (which killed me!!), but then I thought I would lay out the pieces of the other two colors to see how much space was really left unaccounted for. Turns out? Not much. By making a 'T" with the leftover charm squares and using some of the brown that I cut incorrectly as sashing, I came up with my design.

Birthday Quilt

(Un)fortunately, what this mistake also presented was a new challenge in quilting the front and back. I've only previously quilted straight on my machine. However, if I quilted in the ditch or even ran parallel lines down the squares on the front, I was going to have issues with my quilting lines matching up to the lines on the pieced back. Now under some circumstances, this wouldn't be a problem. But with the high contract colors of my quilt and the fact that I was using dark brown thread to quilt, those quilting lines were going to look terrible on the back. And it did...especially since I didn't have my back and front perfectly straight when I basted them together...which really would have been impossible under the circumstances (and maybe always? I'm not sure since I'm still a beginning quilter).

Birthday Quilt - back close up

So what's a novice quilter to do? Learn something new! I watched and read a ton online about free motion quilting and finally used Oh, Fransson's free motion tutorial as a guide. Guys, this tutorial was so great! (If you like quilting and don't already know about Oh, Fransson!, you really need to go check her out. So inspiring!) Free motion was the perfect solution to my problem. I was able to mask the slight offset between my front and back pieces and I love the dimension the quilting lines added to the quilt. And it was so...much...fun!! This will definitely not be my last free motion project.

All in all this was actually a very cost effective project as well. The front cost $12 for the charm packs and the backing and binding totalled about $11.50. I had the perfect piece of leftover batting in my stash and used one and a half spools of 100% cotton thread at about $3.50 each. I love being able to make something so economically without cutting corners. I get a internal thrill whenever it works out so well.

And finally, this is my aunt who won the quilt and the contest honoree.

Birthday Quilt - Recipient

I had so much fun working on this project and I loved having a 'soft' deadline. I seem to work best on deadlines...and if I get to set them, its even better :)

Saturday, April 17, 2010

Small Sewing

One of the things that I like about sewing is the instant gratification factor. It's awesome that in an afternoon or in a couple evenings you can have something to show for your efforts. And lately, given the toddler situation around here, quick bursts of crafting time is all I really have. So it is no wonder, that I am going for my sewing machine a bit more lately. A couple of my more recent sewing projects, all though hardly timely, are below.

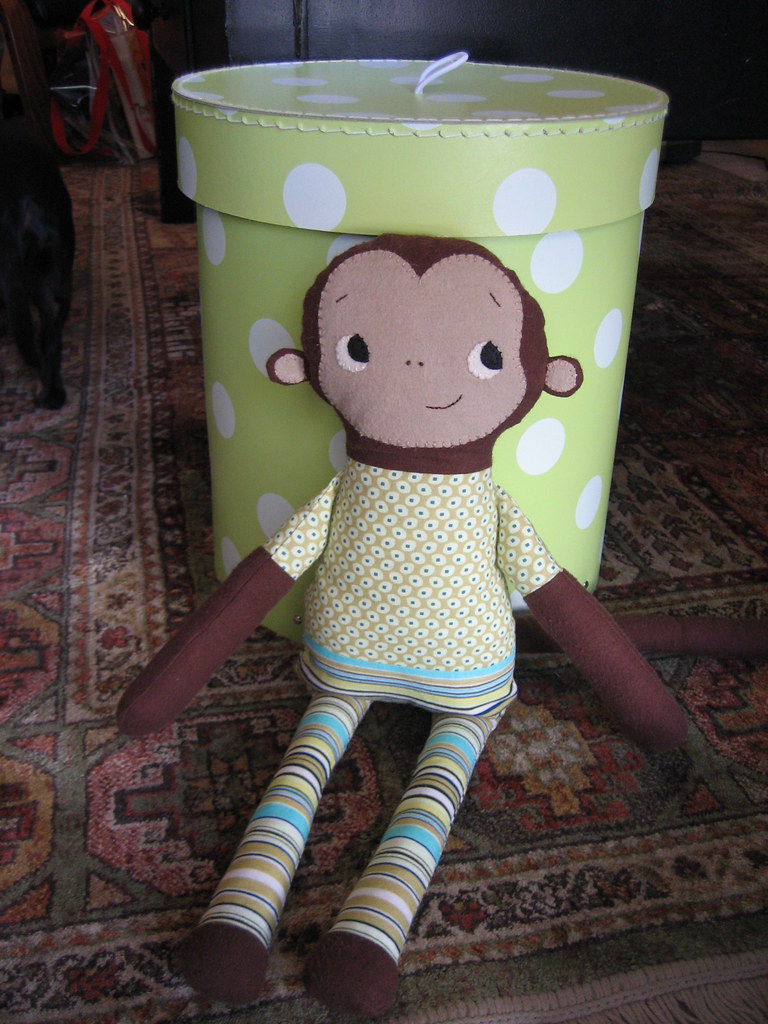
I made two of these 'He-Molly' Monkeys for gifts last Christmas. One I finished (in time) for my cousin's baby and the other was for Elliott...who got it closer to his birthday at the beginning of February. The pattern is basically a boy version of the Molly Monkey. I didn't realize at the time, given my more limited internet-investigating time as of late, that the designer has a boy version for sale, called the Mikey Monkey. Oops. I totally didn't meant to try and get away with not buying the boy pattern, I just saw this one, thought it was cute and thought I would improvise a boy one. However, because she does sell a boy pattern and out of respect to the designer's work, I'm not going to go into details here as to what I did to change things up. It will be more of a show and tell kind of post.

He-Molly Monkey

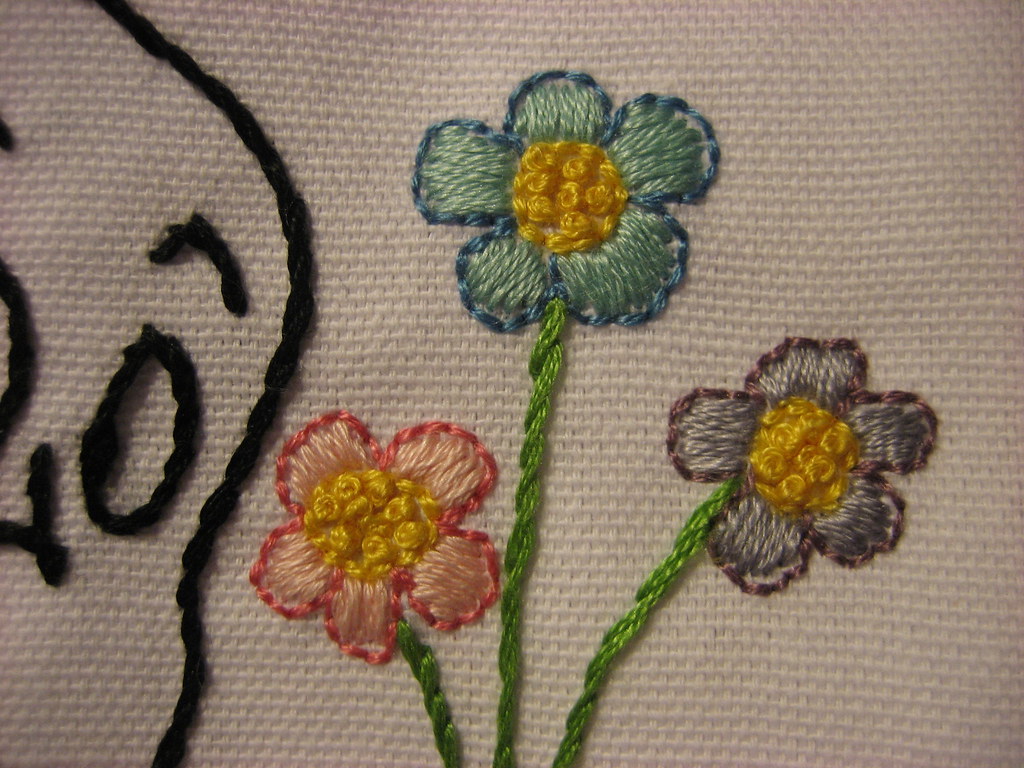
However, a couple of things I will tell you about is how I put the face and head together. Since I knew I wanted to embroider the face (easily), I decided to attach the face pieces first and do the embroidery flat, then sew the whole head together rather than the other way around. I also used some Wonder Under on the face panel and ear panels to stick them to the face and ear pieces really well, then embroidered the details on top.

He-Molly Monkey

I was able to get some remnant flannel at Joann's for the body and face, but otherwise his clothes are all from the scrap bin. I think the two monkeys together cost a whopping $4. :)

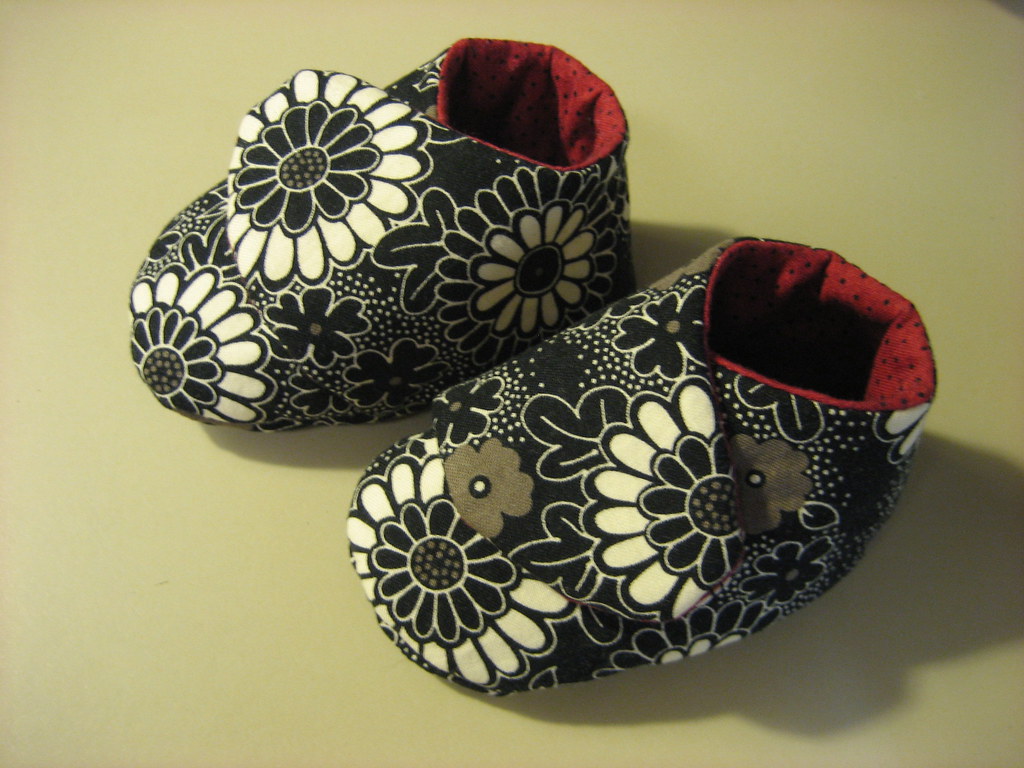
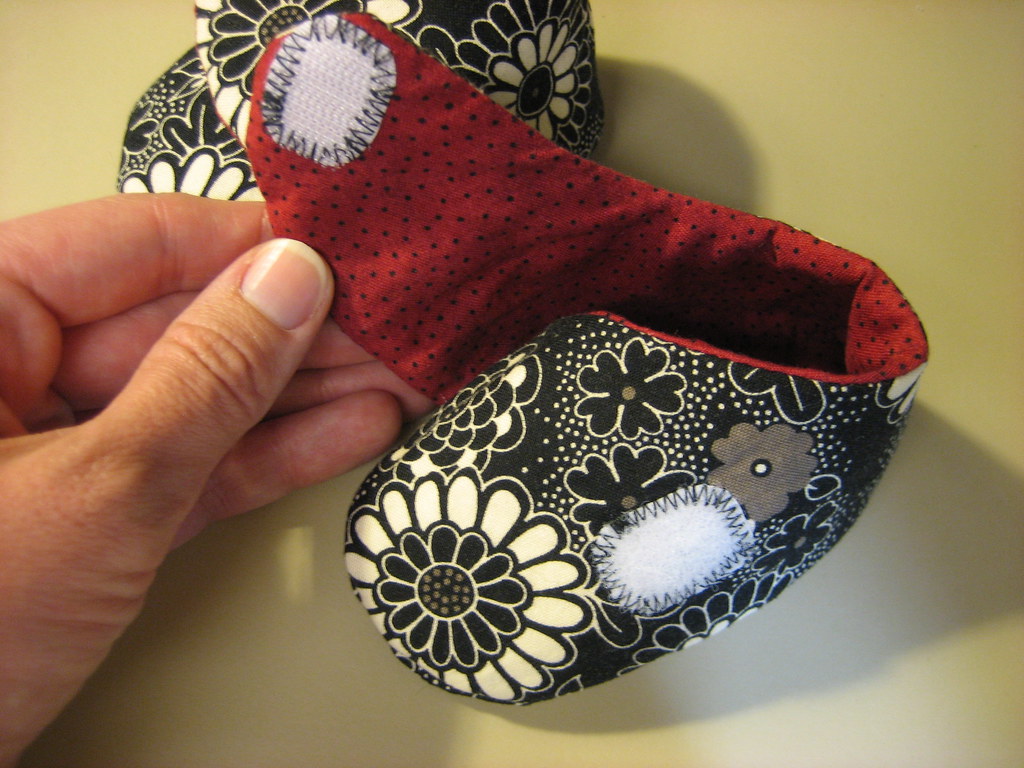
Another relatively quick and cute sewing project was a pair of Cutie Booties for Nonnahs's little girl, Bean. These came from Amy Butler's Little Stitches book and were pretty ingenious to put together. The only trouble I had was due to my decision to work on these after Elliott went to bed and being a little brain fried. With clear thoughts, these probably would have taken me half the time they did.

Cutie Booties

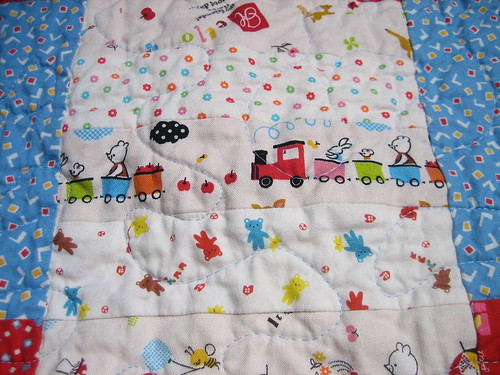
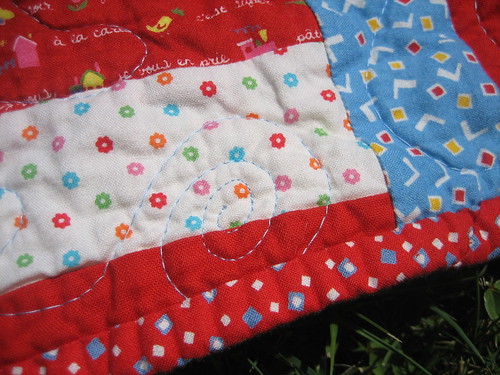
I made the six month size since she was approximately six months at the time these were gifted. And in looking through the scrap bin again for appropriate fabric pieces, I discovered the perfect selection: scraps left over from 
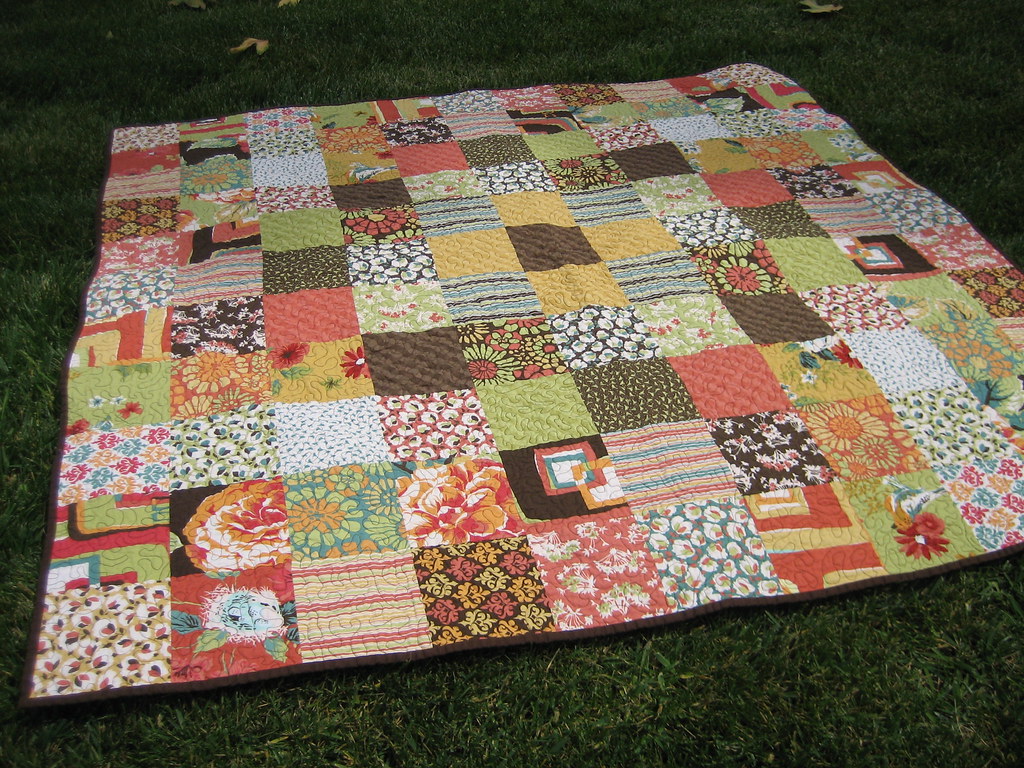
Nonnahs's wedding quilt! I especially like the red on the inside :)

Cutie Booties

Anyway, I can't comment at all on the fit, but they are super cute and would make a great shower gift for someone special.

Speaking of shower gifts (nice segue don't you think ;), I recently put together this set for a co-worker of mine. She LOVES (seriously, in all caps) Tinkerbell. She had even contemplated making a Tinkerbell bedding set for her baby's crib before deciding it just wasn't something she was willing to take on right now. She ended up opting for purple butterflies and I had a great time putting a little set together with 4 Tinkerbell print flannel burp cloths and a Tinkerbell "Cora blanket" (flannel on one side and regular cotton on the other). For both the burp cloths and the blanket I was able to pair a Tinkerbell print with something else so it wouldn't be 'too much' and also tie into their purple butterfly theme.

And I have to say, I think I may have turned a corner in my crafting. I used to rarely, if ever, make something for someone else that I didn't also really like myself. Not to say that I didn't make something specifically for them, just that I had to like it, too. Mostly this was because I had to enjoy the process of making it and if it wasn't something I liked, I used to have trouble getting through it. Anyway, I am far from a Tinkerbell person. I don't have any problem with Tinkerbell, I'm just more of a Winnie-the-Pooh kinda gal. But, I can't tell you how much fun I had with this project. I was so excited about it the whole time I worked on it. I just knew she would really like the prints and I think the fabric prints came together well. And the best part? She (and her husband!) ended up being as excited about them as I was! :)

Tuesday, March 23, 2010

Dabbling in Embroidery...

Long time, no see! I certainly haven't intentionally been neglecting this blog, but I have just come off a busy month at the family blog celebrating Elliott's 1 year birthday. Can you believe it? I'm still in shock that he's a year (well, over 13 months, at this point) already! Anyway, all my limited blogging energy and time was focused over there, but now I need to play some catch up over here. And frankly, I miss you guys!

busy boy!

I've been splitting my crafting time primarily between sewing (Wednesday night is sewing night at my house) and knitting (mostly one focused project at a time. Right now: Liesl). But I recently dabbled a bit in some embroidery. In working with my grandma's embroidery quilt pieces, I got a bit of the embroidery bug. And given that I recently lost my grandma, I suppose it was fitting that I've been experimenting with something she loved so much. So, I worked up some kitchen towels for a few Christmas gifts this year.

First up was a Bambi airstream trailer from the Camp Out set of patterns by Sublime Stitching for my Aunt who just so happens to live in a Bambi! I was originally inspired by the ribbon How About Orange designed a while back, then a friend pointed out the perfect embroidery pattern to go with it!

Embroidery - Air Stream

The Bambi was the only project where I followed a traditional pattern. After that, I started playing around with inspiration, drawing my versions and stitching up those ideas. For example, I knew I wanted to make cherry blossoms for my friends that live in Japan, so I looked around on the Internet and Ravelry until I found something that looked like what was in my head. In this case, I got some inspiration from a purse (sorry only a Rav link). And here's my towel version:

Embroidery: Cherry Blossoms

I also got this idea for Nonnahs, which makes sense to those of you who know her name before and after she got married. Anyway, I found a cute picture from the plethora of Google image options, then changed him up to make him hold flowers.

Casper the Friendly Ghost

I also used the flowers as a chance to practice some different techniques, including satin stitch, back stitch, french knots and stem stitch. By the way, I found a great online resource for how-to embroidery videos at Needle 'n Thread because I have to admit, my embroidery books left a little to be desired.

Casper the Friendly Ghost - flower close up

I also stitched up a towel with Japanese characters for Nasus and her husband's last names. For this I had them give me the hand written characters, then had a Japanese friend at my office put them into the computer and print out a nice block font that would be easier for me to embroider. Here's a taste:


This was a little more challenging in practice than in concept because I don't read Japanese! I was often questioning if the little dip or flange here or there was just a font variation or if I was making a fundamental change to the meaning of the character. Luckily, I think I made it through the experience without mistakenly calling either one of them a bad name ;)

I had a lot of fun playing around with embroidery and it was so amazing to see the designs come to life as I stitched them in floss. Embroidery definitely won't become my primary crafting activity, but I like that I feel a bit more comfortable with the basics and have plans for a couple more projects in the future.